Look, I know there’s always one of these meta posts on these personal blogs that talks about setting up the blog itself but I hope this one will help you, the reader, get started on making one yourself. Having a space to share your thoughts to the world is great and you could learn a thing or two in the process of setting it up. This isn’t meant to be a complete guide, but it should be good enough to get you started on your journey.
The architecture
I’m sure everyone knows about Github Pages and how great they are, and for the most part, I’m of the belief that they’re sufficient for 99% of use cases. However, in the spirit of learning, I want to stray off the beaten path and build my blog on AWS. I’ve always loved thinking about software architecture and infrastructure and this is a great opportunity to dive deep into those things.
To start off, I designed a simple architecture for the blog here. This wasn’t the one I started with but it’s the one I ultimately end up with after a few design decisions I’ll get into later.
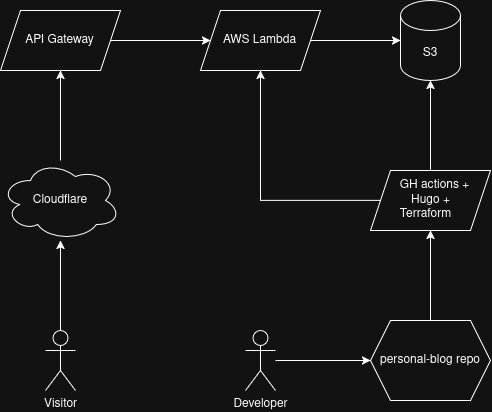
A simple architecture for a simple blog
⚠️ NOTE: I opted to run my blog on AWS purely as a learning experience. While it should only cost you a few pennies a month at most if you follow the steps I describe here, I make no guarantees AWS won’t show up on your door knocking with a bill that sends you to the financial equivalent of the gulag. You have been warned.
The requirements
I laid out my own set of requirements I want this blog to fulfill. After all, it’s my blog, it should be exactly the way I want it.
- Portability: I want to easily spin up the blog and tear it down at a moment’s notice, in case I want to retire it or make major changes. Since uptime isn’t a concern (I don’t care if my blog is down for a few days, weeks, months, or even years!), I want it to be portable and lightweight
- Simplicity: The blog should be simple. No fancy bells and whistles, no complicated login process. It just needs to display text in a way that doesn’t make my eyes bleed
- Cost-effectiveness: In other words, cheap. I don’t want to break the bank running this thing
The stack
With the requirements laid out, we can start thinking about the stack. I thought long and hard about this but this is the summary.
- Terraform: Crucial for portability. Allows me to quickly spin up and tear down the infrastructure at a moment’s notice
- Hugo: Hugo is simple. You generate a static site consisting of basic html and css files and put it somewhere. Those files can then be served to your visitors
- AWS Lambda + S3: These are probably the cheapest services to serve a basic static site on AWS. Lambdas don’t charge you while they’re not running and S3 is dirt cheap especially if you’re only storing a static site with a few dozen files
The workflow
I also want to keep the workflow pretty simple. It should follow these general steps:
Write code -> Push -> Terraform apply -> Upload site to S3 + deploy Lambda function -> [✅] Done!
The last three steps should be automatically using Github Actions.
✨ Tradeoffs: AWS Cloudfront or Cloudflare?
When I first started out planning. I was contemplating between AWS Cloudfront and Cloudflare. At first, Cloudfront seems to be the obvious choice: the pay-as-you-go pricing model offers 1TB of transfer out to the internet per month and it natively supports Lambda without much further tinkering.
The trap with Cloudfront
At the time of creating this blog, AWS recently released a flat-rate pricing model for Cloudfront. At first, it seems like a great deal. You get a CDN, a WAF, DNS, and some other benefits for a flat monthly rate with a free tier option. However, this option is susceptible to DDOS attacks, especially with the lower 100GB transfer quota with the free tier. While AWS won’t charge you for any overages, I don’t want my site to go down for a month to a stray DDOS attack.
⚠️ IMPORTANT: When trying to out the flat-rate pricing on Cloudfront, I enabled it and tore it down a few times. Since I wasn’t using Terraform to keep track of the flat-rate pricing subscription (it wasn’t released yet in the Terraform AWS provider at the time of writing this), there were WAFs that stuck around after I tore down Cloudfront. You will still be charged for these WAFs even when they’re not doing anything and they can be quite expensive.
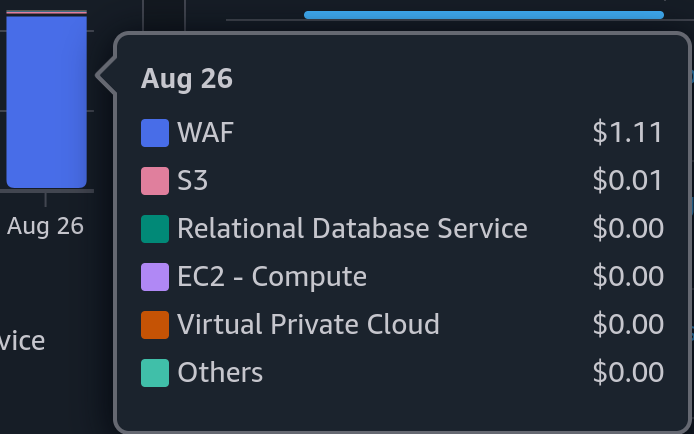
Getting charged over $1 for a few WAFs that ran for a few hours doing nothing
What I went with
In the end, I chose a combination of AWS API Gateway and Cloudflare. While API Gateway charges per-request (which can get expensive really quick), Cloudflare just has more reliable DDOS protection and you can configure it to cache all of your static site’s pages, so most requests don’t end up reaching AWS at all. Cloudflare’s free tier is also a lot more generous and I feel more confident using it to front the blog (#NotSponsored).
The Lambda function
The Lambda function’s job is simple: grab the static files from S3 and serve it. You can do this in any language but I opted to use Rust because Cargo Lambda is a joy to work with and has one of the fastest cold starts in the west. Since Hugo places the html file for any particular page in its path/index.html (for example, the /about page would be placed in /about/index.html), you simply have to tell your Lambda function to route to that, like so:
let bucket = env::var("BUCKET_NAME").expect("BUCKET_NAME env var not set");

// Map the request path to an S3 key.
let mut key = req.raw_http_path().trim_start_matches('/').to_string();

let last_segment = key.rsplit('/').next().unwrap_or("");

// "/" or "/about/" -> serve index.html
if key.is_empty() || key.ends_with('/') {
    key.push_str("index.html");
} else if !last_segment.contains('.') {
    key.push_str("/index.html");
}
Securing the API Gateway
As defined in the architecture, visitors are supposed to be routed through Cloudflare to the AWS API Gateway to invoke the Lambda function and be served the static site from S3. But wait, the API Gateway has a public URL. What’s stopping people from just bypassing Cloudflare and hammering the API Gateway directly? Well, by default, nothing.
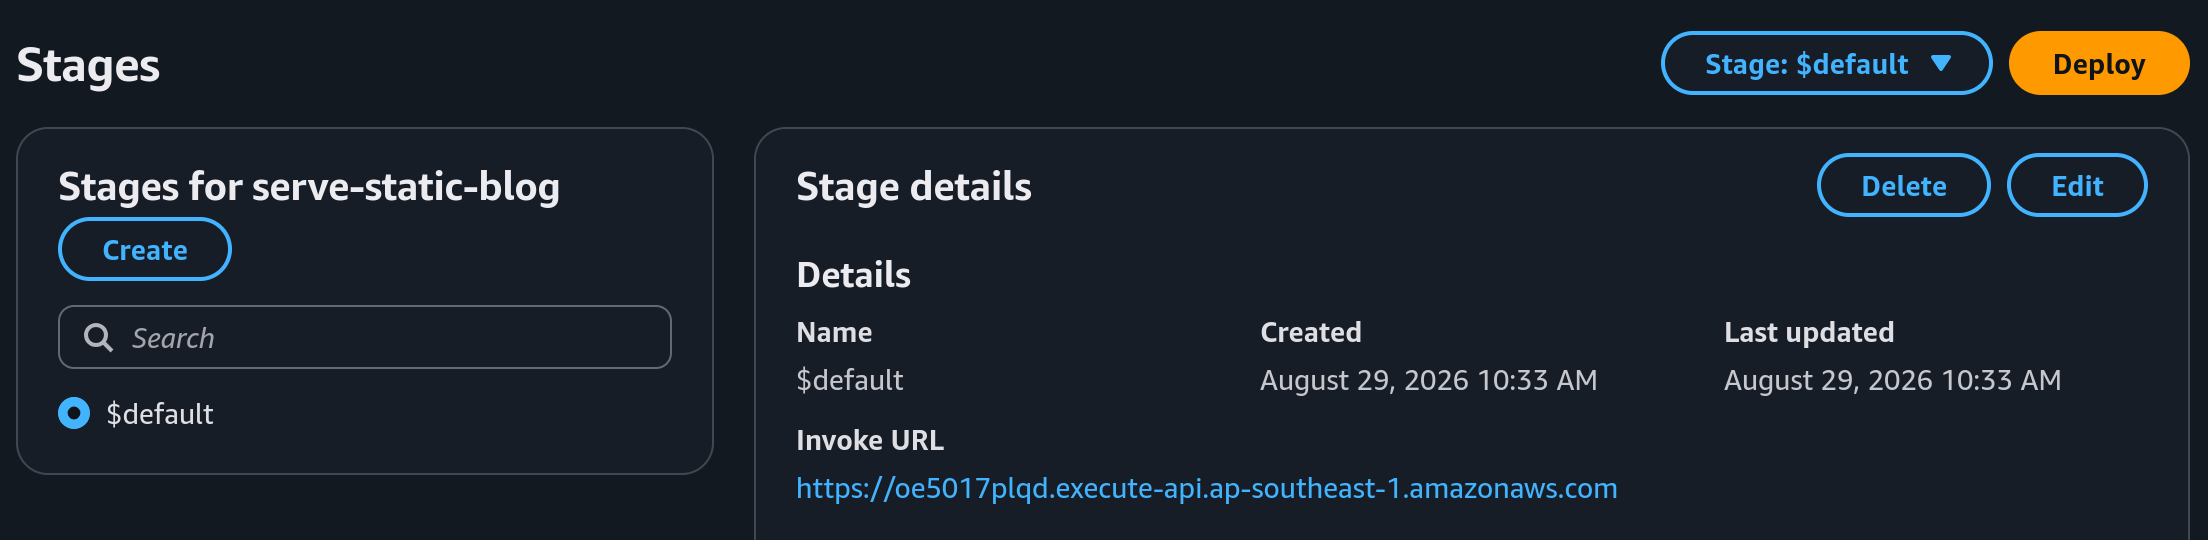
The API Gateway stage has a public URL that anyone can access by default
The way to secure this is easy. Remember, the goal is to ensure only Cloudflare can access the API Gateway. “What’s a good way to make sure only one specific party can access a given resource?”, you might ask. The answer is the classic password. Unlike passwords where humans have to remember, you don’t have to remember or even know what this password is. You can simply let Terraform generate it for you and pass it to both API Gateway and Cloudflare. Cloudflare will take this password and add it to a special http header, and Gateway will check for this header to allow/deny the request based on the password it expects.
resource "random_password" "gateway-pass" {
  length  = 48
  special = false
}
The Gateway can’t check for the password by itself, you have to set up another Lambda function for that:
exports.handler = async (event) => {
  const expected = process.env.GATEWAY_PASS;
  const provided = event.headers?.["gateway-pass"];
  return { isAuthorized: provided === expected };
};
Now give the password to the Gateway authorizer and Cloudflare:
resource "aws_lambda_function" "cf_authorizer" {
  function_name    = "blog-cf-authorizer"
  role             = aws_iam_role.authorizer.arn
  runtime          = "nodejs20.x"
  handler          = "index.handler"
  filename         = data.archive_file.authorizer.output_path
  source_code_hash = data.archive_file.authorizer.output_base64sha256

  environment {
    variables = {
      GATEWAY_PASS = random_password.gateway-pass.result
    }
  }
}


resource "cloudflare_ruleset" "origin_token" {
  zone_id = data.cloudflare_zone.this.zone_id
  name    = "add-origin-token"
  kind    = "zone"
  phase   = "http_request_late_transform"

  rules = [
    {
      action = "rewrite"
      action_parameters = {
        headers = {
          "gateway-pass" = {
            operation = "set"
            value     = random_password.gateway-pass.result
          }
        }
      }
      expression = "true"
      enabled    = true
    }
  ]
}
Now if we head to the Gateway URL, we can see that it is now properly blocked, ensuring every request has to go through Cloudflare.

The authorizer is invoked for every request to the gateway and it’ll check for the password header before granting access
This makes for a setup that is quite secure and actually doesn’t need to reach AWS most of the time, keeping your costs low.
Conclusion
Even with a pretty simple static site blog, you can learn quite a lot about the infrastructure that makes it work while thinking about tradeoffs and patching potential vulnerabilities. The end result is a site that you can spin up in a single workflow trigger, pretty neat!
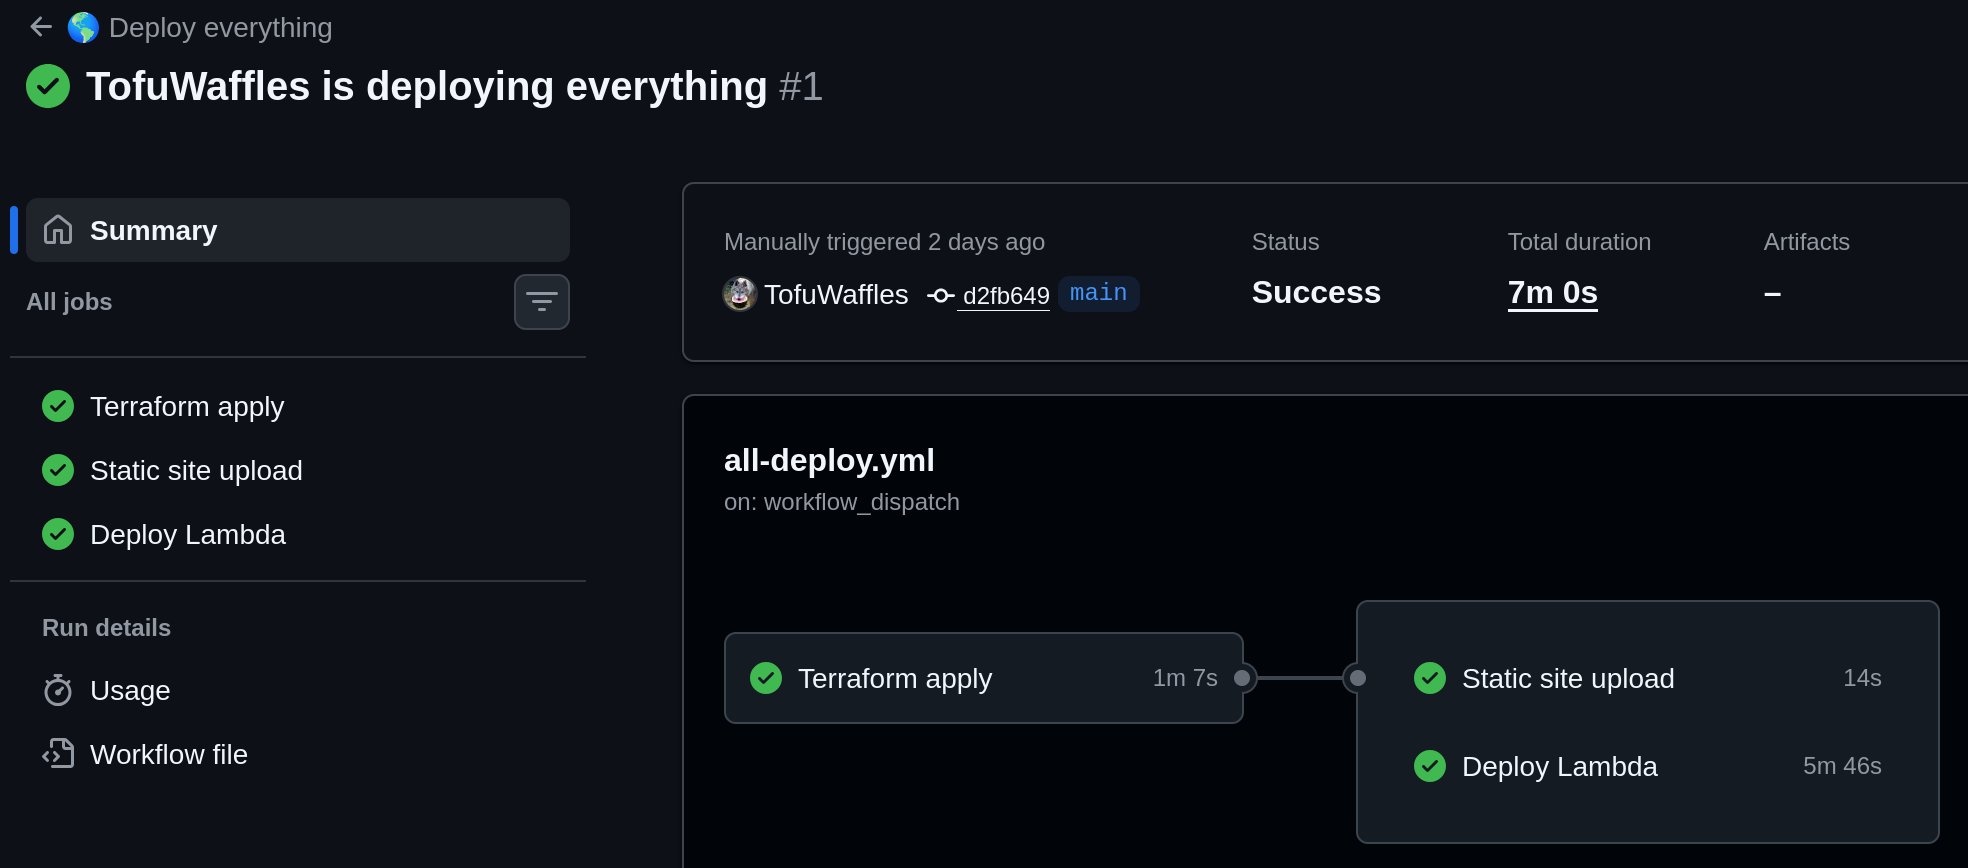 Deploying everything in a single GH Action that finishes in minutes
I currently have the repository set to private but feel free to reach out to me if you want the source code to set up the infrastructure. Cheers and happy learning!